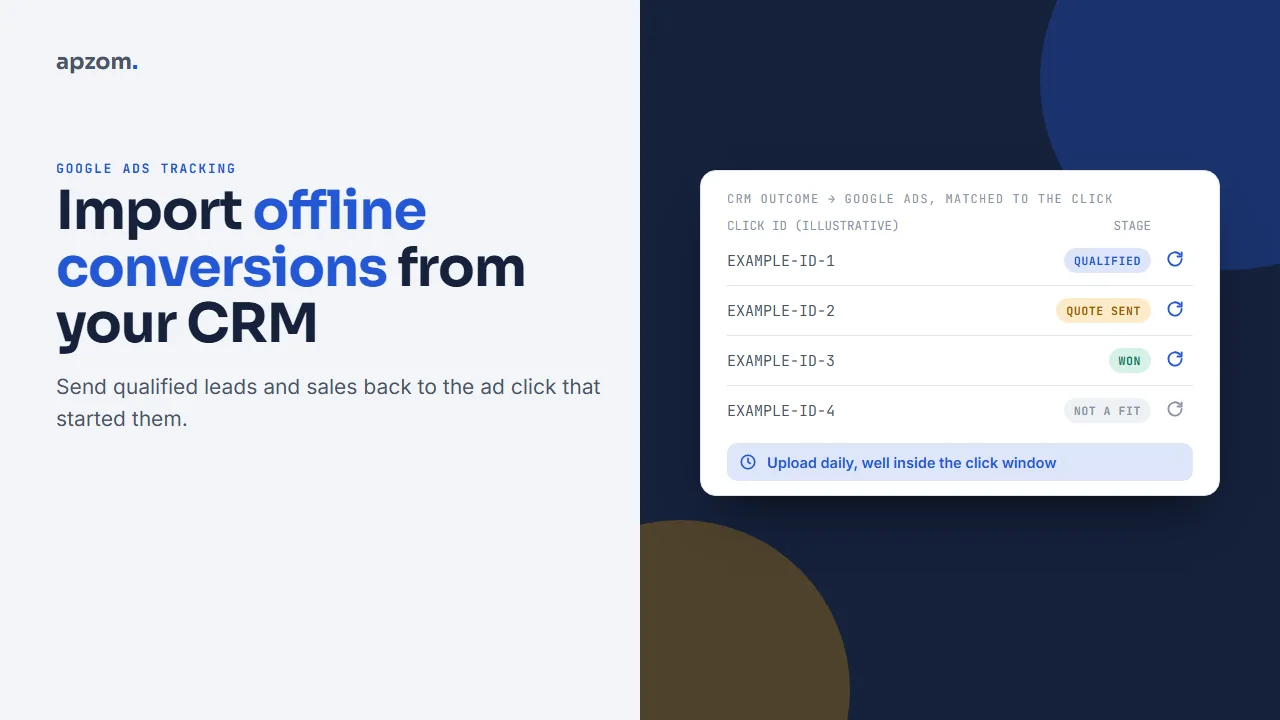
The short answer: Offline conversion import sends what happens to your leads after the form, such as “qualified”, “quote sent” or “won”, from your CRM or spreadsheet back to Google Ads, matched to the ad click that started it. For a new set-up, Google now recommends enhanced conversions for leads, imported through Google Ads Data Manager: your website tag captures a hashed email or phone number when the form is submitted, and you later upload the outcome with the same hashed details. The older route, uploading a file of Google click IDs (GCLIDs), still works but Google’s help now labels it “legacy”. Either way you need a conversion action per outcome you report, exact names, correct times and a daily upload habit.
This guide is for marketers, sales managers and business owners anywhere in the world who run Google Ads for leads and want the account to learn from real sales outcomes, not just form fills. It is the step-by-step companion to our guide to improving Google Ads lead quality, which explains why outcomes matter and which stage to bid to. Here we cover the set-up itself: capturing identifiers, mapping CRM stages, creating conversion actions, choosing an upload route, reading diagnostics and handling consent. We checked these steps against Google’s and Microsoft’s help pages on 17 November 2026.
What offline conversion import does, and when you need it
A normal Google Ads conversion fires on your website: a form is submitted or a call lasts long enough. That tells Google which clicks produced enquiries, but not which enquiries were any good. If half your leads are spam, students or people outside your area, the account keeps finding more of them.
Offline conversion import closes that gap. Your sales team marks what happened to each lead in your CRM, and those outcomes go back into Google Ads as conversions linked to the original click. You can then see which campaigns, keywords and searches produce qualified leads and sales, and, once you have enough volume, let Smart Bidding aim for those instead of raw form fills.
You need it if:
- your leads are worked by a person (a call, a quote, a site visit) before anyone pays;
- your sales cycle runs from days to a few months;
- you can tell good leads from bad ones after the first conversation;
- you spend enough on Google Ads that better targeting is worth a few hours of set-up.
If you sell online and the sale happens on your site, standard conversion tracking with values already does this job.
Choose your method
There are two ways to match a CRM outcome back to a click.
| Method | How it matches | Best for | Watch out for |
|---|---|---|---|
| Enhanced conversions for leads | Hashed email or phone number captured by your website tag at form submit, matched when you upload the outcome | New set-ups; Google’s recommended starting point | Your form must collect an email or phone number; you accept Google’s customer data terms; file uploads must use Data Manager |
| Click ID import (GCLID), labelled “legacy” by Google | The GCLID stored with each lead | Existing set-ups and CRMs that already store GCLIDs | Every lead must carry its click ID; some iPhone traffic carries GBRAID or WBRAID instead |
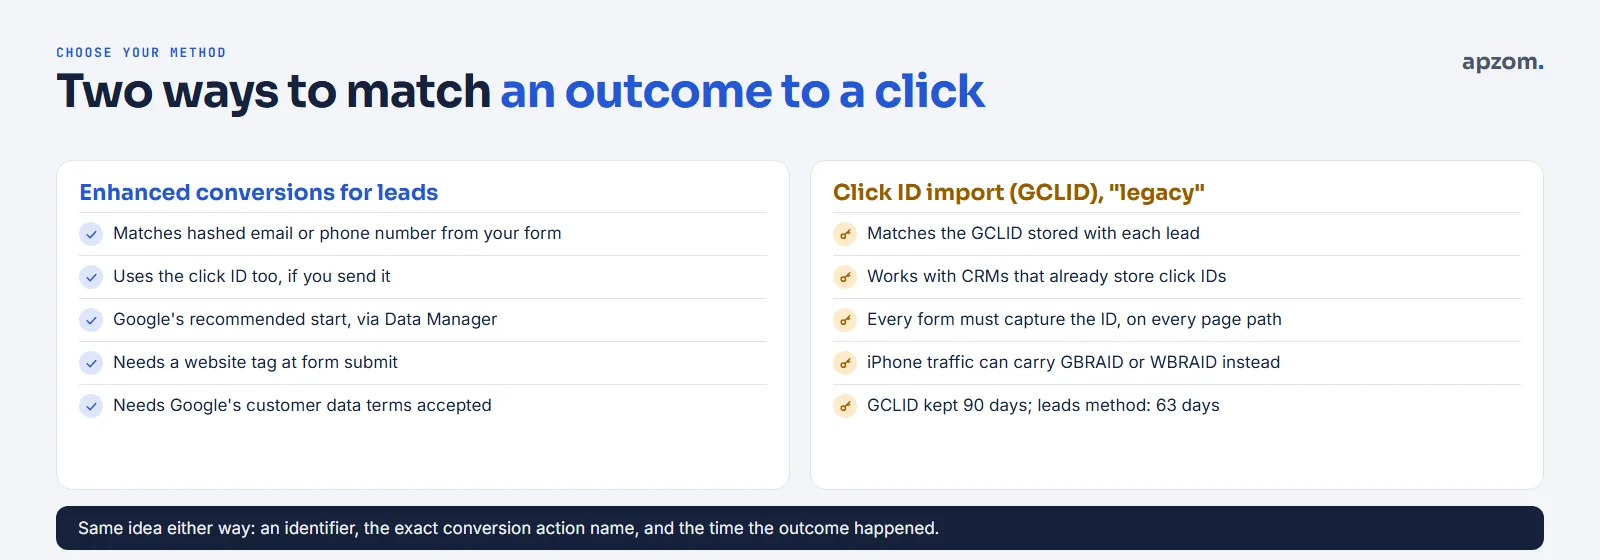
Google’s help page “Import conversions from ad clicks into Google Ads using files (legacy)” says that if you haven’t set up offline imports yet, you should start with enhanced conversions for leads instead. It still recommends sending the GCLID when you have it, and the GCLID is required if no tag collects user-provided data. One caution from the same help pages: sending both a GCLID and hashed data can occasionally cause matching conflicts, and if that happens Google suggests sending only the hashed data.
Enhanced conversions for leads needs the Google tag (or Google Tag Manager) to send the hashed form details when the lead is first captured. Our Google Tag Manager for beginners guide covers the tag basics, and Google’s page “Configure the Google tag for enhanced conversions for leads” covers this specific set-up.
Step 1: Capture the identifiers with every lead
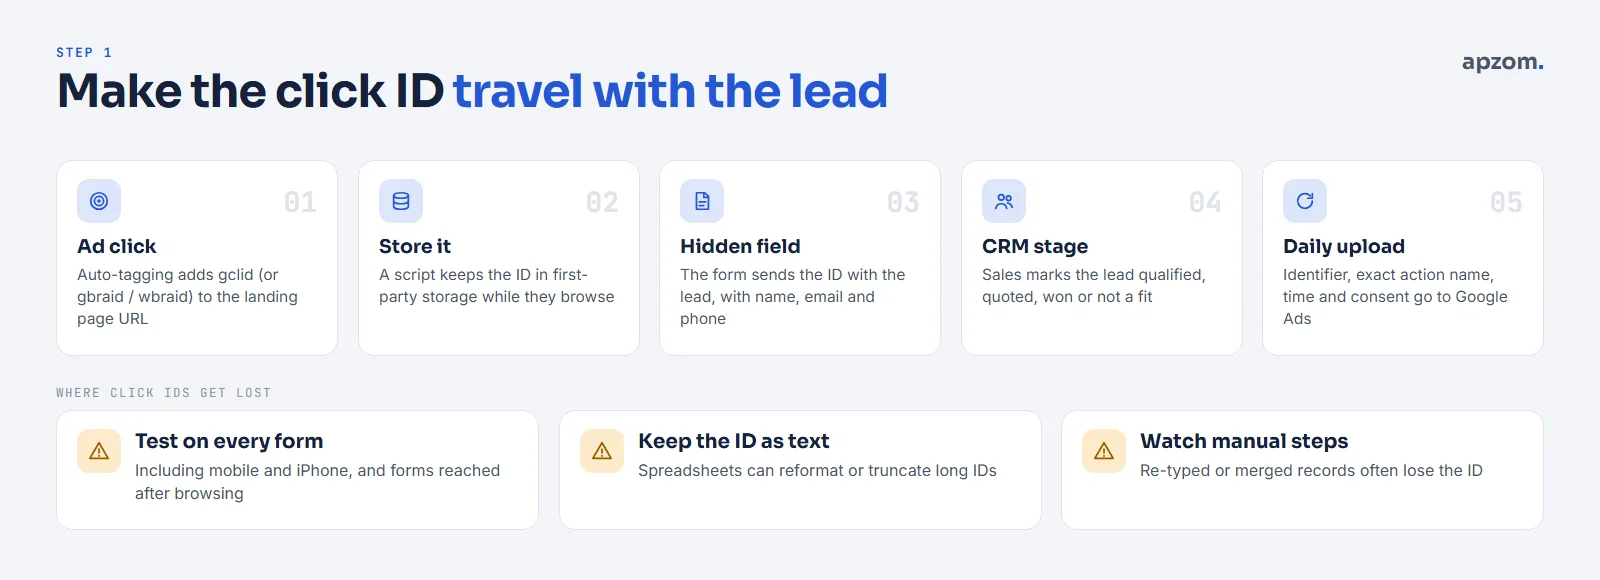
Whichever method you use, start by making sure every lead record carries what Google needs to find the click.
Turn on auto-tagging. Google’s “About auto-tagging” page explains that auto-tagging adds a gclid parameter to your landing page URLs. Check that it is switched on in your account settings.
Capture the click ID into your form. Add a hidden field called something like gclid to every lead form, and fill it from the landing page URL. People often browse several pages before enquiring, so store the value in first-party storage when they land, then read it when they submit. Some iPhone traffic arrives with gbraid or wbraid instead, so capture those too. A simple version, for a site where you can add a script:
<script>
(function () {
  var keys = ['gclid', 'gbraid', 'wbraid'];
  var p = new URLSearchParams(location.search);
  var found = keys.filter(function (k) { return p.get(k); });
  if (found.length) {
    try {
      keys.forEach(function (k) { localStorage.removeItem('apz_' + k); });
      found.forEach(function (k) { localStorage.setItem('apz_' + k, JSON.stringify({ v: p.get(k), t: Date.now() })); });
    } catch (e) {}
  }
  function fill() {
    keys.forEach(function (k) {
      var s;
      try { s = JSON.parse(localStorage.getItem('apz_' + k) || 'null'); } catch (e) { return; }
      if (!s || Date.now() - s.t > 90 * 864e5) return;
      document.querySelectorAll('input[name="' + k + '"]').forEach(function (f) { f.value = s.v; });
    });
  }
  if (document.readyState === 'loading') document.addEventListener('DOMContentLoaded', fill); else fill();
  document.addEventListener('submit', fill, true);
})();
</script>
This is an illustrative script, not a drop-in product. It keeps only the identifiers from the latest ad click, and also fills forms that appear after the page loads. Test it on your own forms, add hidden fields named gclid, gbraid and wbraid, and make sure your privacy notice and consent banner cover storing these values. Many form tools, CRMs and Google Tag Manager templates can do the same job without custom code.
Capture the email or phone number cleanly. For enhanced conversions for leads, the details you upload later must match what the tag hashed at form submit. Google’s set-up page says to normalise before hashing with SHA-256: trim spaces and lower-case email addresses (and remove dots before the @ in gmail.com and googlemail.com addresses), and format phone numbers in E.164 international format, such as +447700900123.
Carry it all into the CRM. Map each hidden field to a field on the lead record, and check that it survives any step where leads are copied, merged or re-entered by hand. A click ID that gets lost when a salesperson creates a new record is a common reason imports fail quietly.
Do not forget calls and ad lead forms. Calls from Google forwarding numbers are tracked separately (see our guide to tracking phone calls from Google Ads). Leads from Google’s lead form assets come from Google itself, so connect them to your CRM with Google’s webhook or a CRM integration rather than downloading files by hand, and check which fields your webhook passes before you rely on them for imports.
Step 2: Map your CRM stages to conversion actions
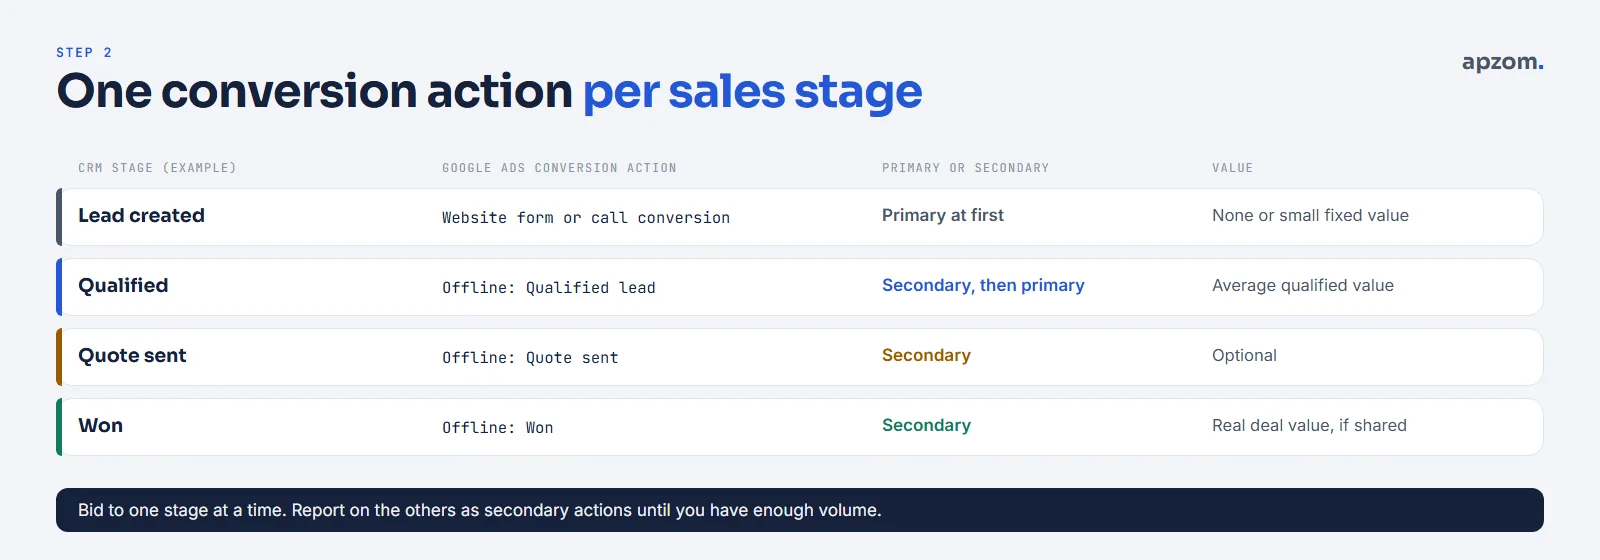
Write down the stages a lead moves through in your CRM, then decide which ones to send to Google Ads. We recommend one conversion action per stage, so each can be reported separately and you can choose which one to bid to.
| CRM stage (example) | Google Ads conversion action | Primary or secondary | Value (optional) |
|---|---|---|---|
| Lead created (form or call) | Your existing website or call conversion | Primary at first | None, or a small fixed value |
| Qualified (real need, right area, reachable) | Offline: Qualified lead | Secondary, then primary once volume allows | An average value for a qualified lead |
| Quote or proposal sent | Offline: Quote sent | Secondary | Optional |
| Won | Offline: Won | Secondary | The real deal value, if you share it |
Google’s page “About primary and secondary conversion actions” explains the difference: primary actions are used for reporting and bidding and appear in the “Conversions” column, while secondary actions are for observation and appear in “All conversions” (unless you add them to a custom goal, which makes them count for bidding). Which stage to make primary depends on how many of them you get and how soon they happen after the click. Our lead quality guide sets out a simple ladder for that decision, so we won’t repeat it here.
Agree the definitions in writing with your sales team. “Qualified” must mean the same thing on Monday and Friday, or the data you send will teach Google the wrong lesson.
Step 3: Create the offline conversion actions in Google Ads
Create the conversion action before you upload anything. As of 17 November 2026, Google’s help page “Set up offline conversion imports using Google Click ID (GCLID)” gives the path as Goals, then Summary, then “+ Create conversion action”, choosing “Conversions offline” and then adding a data source (or skipping that and connecting one later). Menu wording changes from time to time, but the choices are the same:
- Name: something your team will recognise in reports, such as “Offline: Qualified lead”. Use exactly this name in every upload.
- Category: the lead category that best fits the stage.
- Value: a fixed value, a value you send with each upload, or no value.
- Count: “One” suits most lead stages, so a lead is counted once per click. Google requires “Every” for conversions uploaded with GBRAID or WBRAID, so check the rule if many of your leads come from iPhones.
- Click-through conversion window: long enough for your sales cycle.
- Primary or secondary: as you decided in step 2.
For enhanced conversions for leads, also accept the customer data terms (Google places these under Goals, then Settings) and turn on enhanced conversions. Google is combining the enhanced conversions settings for web and for leads into one setting, so the switch may look different in your account.
Then wait. Google says to allow 4 to 6 hours after creating a new conversion action before you upload to it; uploads sent sooner can take about two days to appear.
Step 4: Know what the upload must contain
Whether you upload by hand, by schedule or through a connector, the data has the same shape. For the legacy click ID file, Google’s template (downloaded from Goals, then Conversions, then Uploads) requires three columns, Google Click ID, Conversion Name and Conversion Time, and allows optional columns for Order ID, Conversion Value, Conversion Currency, Ad User Data and Ad Personalization. A minimal file looks like this (illustrative rows, not real click IDs):
Parameters:TimeZone=-0500
Google Click ID,Conversion Name,Conversion Time,Conversion Value,Conversion Currency,Order ID
EXAMPLE-CLICK-ID-1,Offline: Qualified lead,2026-11-12 14:05:00,100,USD,Q-1042
EXAMPLE-CLICK-ID-1,Offline: Won,2026-11-14 09:30:00,2400,USD,W-1042
The rules to check before every upload:
- The conversion name must match the conversion action’s name exactly.
- The conversion time must be after the click and include a time zone, either as the
Parameters:TimeZoneline at the top (an offset like -0500 or a name like America/Chicago) or in each row. - The click must be recent enough. Google keeps the GCLID for 90 days, so outcomes that happen months later need an earlier stage you can upload in time. Enhanced conversions for leads accepts conversions up to 63 days after the last click.
- Values and currency must be plain numbers and three-letter ISO currency codes, such as USD or EUR.
- One row per outcome. If the same lead becomes “Qualified” and later “Won”, that is two rows, for two conversion actions.
- Use an Order ID. Google strongly recommends a unique Order ID per conversion. It prevents duplicates, and if you include it at import, it is the simplest way to retract or restate the conversion later.
- Don’t delete the Google Click ID column, even if you leave it empty; Google warns the import fails without it.
- GBRAID and WBRAID go elsewhere. Google’s legacy click ID template doesn’t list a column for them, so send those conversions through Data Manager or the Data Manager API.
For enhanced conversions for leads, Google says file uploads must be Data Manager files, with the hashed email or phone number in place of (or as well as) the click ID. Data Manager shows the current format, and most connectors normalise and hash the data for you.
Step 5: Choose how to upload
| Route | Effort | Best for |
|---|---|---|
| Google Ads Data Manager, with a CRM connection | Moderate: connect the CRM and map stages to conversion actions | CRMs Google connects to directly; Google lists HubSpot, Salesforce (offline conversion import only) and Zoho CRM among them |
| Data Manager or Uploads, from a file, Google Sheet, HTTPS or SFTP | Low to moderate: a file or sheet your team or CRM keeps updated, fetched once or on a schedule | Firms without a CRM integration |
| Third-party integration (for example Zapier) | Moderate: a workflow that sends each stage change | CRMs without a direct connection |
| Data Manager API | High: developer time | Large accounts and custom CRMs |
In Google Ads, Data Manager sits under Tools, then “Data manager”, and one-off and scheduled file uploads sit under Goals, then Conversions, then Uploads. The spreadsheet route is the one most small firms can run without a developer: keep one tab in Google’s format, add a row whenever a lead reaches a stage, and schedule Google Ads to fetch it daily. Two details matter:
- Upload daily. The click windows above mean a weekly or monthly habit loses conversions, and bidding learns slowly from late data.
- Check the look-back. Google’s Data Manager help says connections such as Salesforce, HubSpot and BigQuery look back only 14 days on each run, while file, Sheets, SFTP and HTTPS sources look back 90 days. An outcome that sits unsynced for more than two weeks can be missed by a connector.
If you or a developer use the API, note the change on Google’s Ads Developer Blog post “Changes to Offline Click Conversion Import Support in the Google Ads API” (15 May 2026): from 15 June 2026 the Google Ads API no longer accepts new adopters of offline click conversion imports, so new integrations must use the Data Manager API, while existing allowlisted integrations can continue while they migrate. Google’s pages don’t say this affects uploads in the Google Ads interface or from Google Sheets.
Not sure your click IDs survive the trip from form to CRM? Ask for a Free Growth Audit. We check your auto-tagging, forms, CRM fields and conversion actions, and tell you where outcomes are being lost and what to fix first.
Step 6: Read the diagnostics and fix the common errors
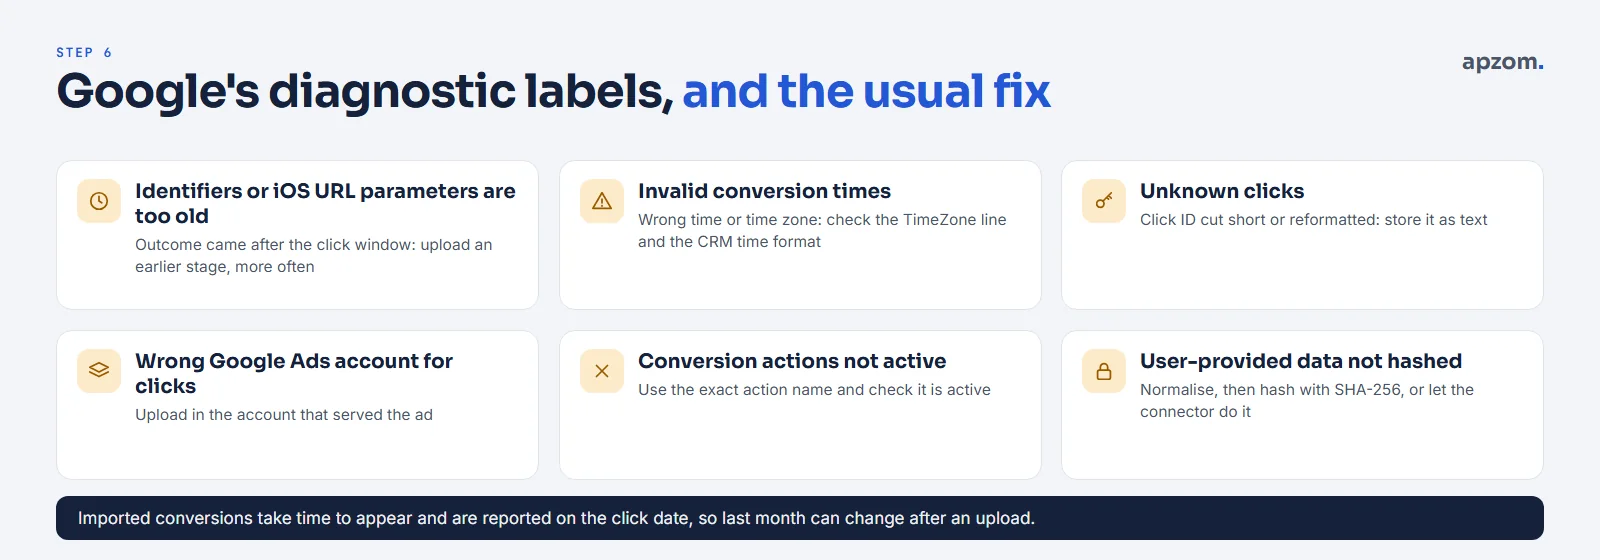
After each upload, Google Ads shows how many rows were processed and why the rest failed, and its “offline data diagnostics” show problems over time. Imported conversions don’t appear straight away: Google’s help gives about 3 hours for most, typically under 12 hours, up to 72 hours for GBRAID and WBRAID, and 24 to 48 hours to process fully. They are reported against the date of the original click, not the upload date, so last month’s numbers can rise after you upload. The “All conv. (by conv. time)” column shows them by conversion date instead.
| Google’s diagnostic label | Usual cause | Fix |
|---|---|---|
| Identifiers or iOS URL parameters are too old | The outcome came after the click window | Upload an earlier stage, and upload more often |
| Invalid conversion times (or “conversion date precedes click date”) | Wrong time or time zone | Check the time zone line and the CRM’s time format |
| Unknown clicks | The click ID was cut short, edited or doesn’t exist | Store click IDs as text, and never let a spreadsheet reformat them |
| Wrong Google Ads account for clicks | The click belongs to a different Google Ads account | Upload in the account that served the ad, or use the right manager account |
| Conversion actions not active | The conversion name doesn’t match an active action | Copy the exact name from Google Ads and check the action’s status |
| User-provided data not hashed | Email or phone sent in plain text where hashing was expected | Normalise and hash with SHA-256, or let the connector do it |
| Click too recent | The upload came very soon after the click | Wait and upload on your normal schedule |
Test before you rely on it: submit a few test enquiries through an ad click, follow them into your CRM, mark them at a stage, upload, and check they appear. Mark test leads clearly and remove them from your sales reports.
Correcting a conversion after you upload it
Deals fall through and values change. Google’s “About conversion adjustments” page explains that you can retract an uploaded conversion or restate its value by uploading an adjustment, in the same way you import conversions. Identify each one by its Order ID (recommended) or by click ID plus conversion time. Google’s help adds three limits: a retracted conversion, or one restated to zero, can’t be adjusted again; values can be restated for up to 55 days; and conversions uploaded with GBRAID can only be adjusted by Order ID.
Consent and privacy
You are sending information about real people to Google, even when it is hashed. Before you switch this on:
- Tell people in your privacy notice that you share lead and outcome data with advertising platforms for measurement.
- In the EEA and the UK, Google’s EU user consent policy requires you to collect consent for using personal data for advertising. Pass each person’s consent status in the Ad User Data and Ad Personalization columns (values Granted or Denied) or the matching API fields. Google’s developer documentation warns that without it, conversions may not be attributable.
- For enhanced conversions for leads, you accept Google’s customer data terms, and the email or phone number is normalised and hashed before it is sent.
- Elsewhere, privacy laws in US states, Canada, Australia, the UAE and India set their own notice and consent rules. Check the law where your customers are, and take advice if you are unsure. This is not legal advice.
Microsoft Advertising works the same way
If you also run Microsoft Advertising, it has its own offline conversion import based on its click ID, msclkid. Keep Microsoft’s auto-tagging of the click ID switched on, capture msclkid into a hidden field the same way as the GCLID, create an offline conversion goal, and upload the click ID, the exact goal name and the conversion time. Microsoft’s developer documentation (the OfflineConversion reference on Microsoft Learn) says to wait two hours after creating the goal before you upload, allow up to six hours for data to show, and send only conversions from the last 90 days that fall after the click and within the goal’s conversion window. It also accepts a hashed email or phone number in place of the click ID. Keep msclkid in its own CRM field, next to the GCLID, and upload both on the same daily routine. If you also run Meta ads, the matching idea there is the Conversions API, which our guide to setting up the Meta Pixel and Conversions API covers.
Common mistakes
- Uploading every lead as “qualified”. If the definition is loose, Google learns nothing new. Agree a strict definition first.
- Switching bidding to an offline stage too early. Without enough conversions, Smart Bidding has too little to learn from. Report on the stage first, then switch.
- Losing identifiers between the form and the CRM. Check every form, every integration and every manual step.
- Uploading once a month. Outcomes older than the click window are rejected, and bidding learns slowly from late data.
- Counting the same outcome twice, for example by importing a stage from both a CRM connection and a spreadsheet. Use one route per conversion action, and Order IDs.
- Uploading to a brand-new conversion action straight away. Wait the 4 to 6 hours Google asks for.
- Forgetting consent in the EEA and the UK, or uploading data your privacy notice doesn’t cover.
- Treating the result as a sales report. Google Ads only sees outcomes linked to ad clicks. Keep your CRM as the source of truth for total sales, as our guide to measuring marketing ROI explains, and remember that each platform credits conversions by its own attribution model.
How Apzom can help
As part of our Google Ads management, we can set up the tracking this guide describes: identifier capture on your forms, CRM field mapping, conversion actions per stage, Data Manager or scheduled uploads, consent fields and the checks that keep them working. If you want an outside view first, our Google Ads audit checklist covers conversion tracking alongside the rest of an account, and our performance marketing work covers measurement across channels.
We have not published Google Ads results for any client, so we won’t quote improvements we can’t show you.
We work with clients worldwide, remotely, from our base in Ahmedabad, India.
Get your Free Growth Audit and Quote. We review your Google Ads conversion tracking from the click to the closed deal: auto-tagging, click ID capture, CRM stages, conversion actions, uploads and consent settings. You get a prioritised list of fixes, and a quote if you want us to set up the imports for you.
No obligation and no guaranteed results. Prefer to talk first? Contact us or see our Google Ads management.
Frequently asked questions
What is offline conversion import in Google Ads?
It is a way to send conversions that happen outside your website, such as a lead becoming qualified or a deal being won in your CRM, back to Google Ads. Each conversion is matched to the ad click that started it, using hashed customer details (enhanced conversions for leads) or the click ID.
Do I need a CRM to import offline conversions?
No. A Google Sheet or file in Google’s format, updated by your team and fetched by Google Ads on a schedule, is enough for many small firms. A CRM connection through Data Manager saves the manual step if your CRM is supported.
How long do I have to upload an offline conversion?
Google keeps the click ID for 90 days, and enhanced conversions for leads accepts conversions up to 63 days after the last click. If your sales take longer, upload an earlier stage, such as a qualified lead, that happens inside those windows.
What is the difference between GCLID import and enhanced conversions for leads?
GCLID import matches each outcome to the click ID stored with the lead, and Google’s help now labels the file version “legacy”. Enhanced conversions for leads matches hashed email addresses or phone numbers captured by your website tag, and can use the click ID too. Google recommends enhanced conversions for leads for new set-ups.
Why are my offline conversions not showing in Google Ads?
Check the upload results and offline data diagnostics first: mismatched conversion names, missing time zones, conversion times before the click and identifiers past the click window are the usual causes. Also check you waited 4 to 6 hours after creating the action. Imported conversions take hours to appear and are reported against the click date, so look at the date of the clicks, not the upload.
Should I bid to offline conversions straight away?
Usually not. Start by recording the offline stage as a secondary conversion, check that the numbers match your CRM, and switch bidding only when you have enough of them. Our lead quality guide explains how to choose the stage.